
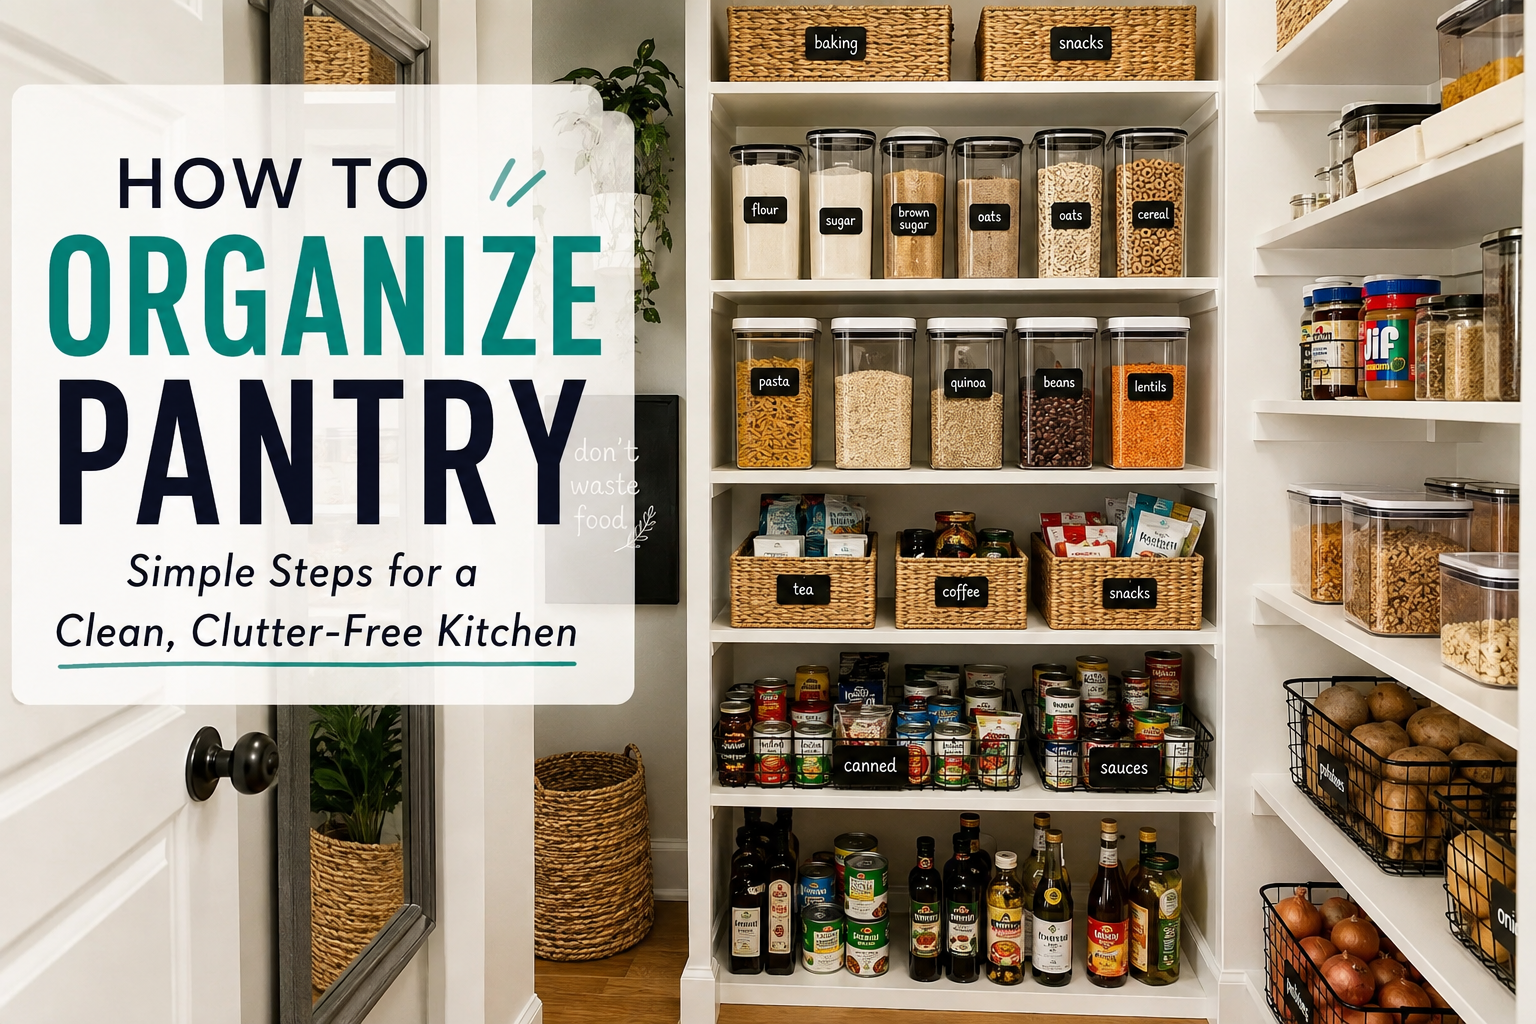
A well-organized pantry does more than make your kitchen look tidy—it saves time, reduces food waste, and makes meal preparation much easier. If you’ve ever bought a duplicate ingredient because you couldn’t find the one you already had or discovered expired food hidden in the back of a shelf, you’re not alone. Learning how to organize pantry spaces effectively can transform your daily routine and help you make the most of every inch of storage.
The good news is that pantry organization doesn’t require an expensive makeover. With a thoughtful plan, a few practical storage solutions, and regular maintenance, you can create a pantry that’s both functional and visually appealing. Whether you have a walk-in pantry, a small cabinet, or a few kitchen shelves, the same organizing principles apply.
This step-by-step guide will show you exactly how to organize pantry spaces like a pro, with practical tips, expert advice, and easy-to-follow examples.
Why Organizing Your Pantry Matters
A clutter-free pantry isn’t just about aesthetics. It helps you stay organized, save money, and make cooking less stressful.
Save Time Every Day
When every ingredient has a designated place, you spend less time searching and more time cooking. Clearly labeled containers and organized shelves make meal preparation much faster.
Reduce Food Waste
Expired products and forgotten ingredients often end up in the trash. Organizing your pantry allows you to see what you already have, making it easier to use older items before purchasing new ones.
Maximize Storage Space
Even a small pantry can hold much more when shelves, baskets, and containers are used effectively. Vertical storage and stackable containers help utilize every inch.
Simplify Grocery Shopping
Knowing exactly what’s in your pantry helps you create accurate shopping lists and avoid buying duplicates.
Keep Food Fresher Longer
Proper storage containers protect dry goods from moisture, pests, and air exposure, helping ingredients maintain their quality for longer.
Before You Start: Gather Your Pantry Organization Supplies
Having the right tools makes organizing easier and helps maintain order over time.
Some of the most useful pantry organizers include:
- Clear airtight containers
- Storage baskets
- Pantry labels
- Label maker or waterproof stickers
- Shelf risers
- Lazy Susans
- Stackable bins
- Drawer organizers
- Measuring tape
- Microfiber cloth and cleaning spray
Pantry Organization Supplies Comparison
| Storage Tool | Best For | Recommended |
| Airtight Containers | Flour, rice, sugar, pasta | ★★★★★ |
| Storage Baskets | Snacks and packets | ★★★★★ |
| Shelf Risers | Canned goods | ★★★★☆ |
| Lazy Susan | Oils, sauces, spices | ★★★★★ |
| Labels | Easy identification | ★★★★★ |
| Stackable Bins | Deep shelves | ★★★★☆ |
You don’t need to purchase everything at once. Start with the essentials and gradually add organizers based on your pantry’s size and needs.
Step-by-Step Guide: How to Organize Pantry
Following a simple process makes pantry organization much more manageable.
Step 1: Empty the Entire Pantry
Remove everything from the shelves before you begin organizing.
Although it may seem like extra work, starting with an empty pantry allows you to:
- Spot expired food
- Identify duplicates
- Deep clean shelves
- Plan a better layout
Place all pantry items on a table or countertop where you can easily sort them.
Pro Tip: Take a photo of your pantry before you start. Comparing the “before” and “after” can be motivating and help you refine your organization system.
Step 2: Clean Every Shelf Thoroughly
Once the pantry is empty, clean every surface.
Remove crumbs, wipe shelves with a mild cleaner, and vacuum corners where dust or food particles may collect. This is also a good opportunity to inspect for signs of pests or moisture.
Starting with a clean pantry helps preserve food quality and creates a fresh foundation for organization.
Step 3: Check Expiration Dates
Go through every item carefully.
Discard products that are expired, stale, or damaged. If you find unopened food that is still safe but unlikely to be used, consider donating it to a local food bank.
As you sort, create separate piles for:
- Keep
- Donate
- Recycle
- Discard
This simple process instantly reduces clutter.
Step 4: Group Similar Foods Together
One of the biggest secrets to an organized pantry is creating logical categories.
Instead of placing items wherever there’s space, organize them by type.
Common pantry categories include:
- Baking ingredients
- Breakfast foods
- Pasta and rice
- Canned vegetables
- Soups
- Snacks
- Coffee and tea
- Spices
- Condiments
- Oils and vinegar
- Pet food
Grouping similar products makes ingredients much easier to locate.
Example Pantry Zones
| Zone | Items Included |
| Breakfast | Cereal, oats, coffee, tea |
| Baking | Flour, sugar, cocoa, baking powder |
| Snacks | Crackers, granola bars, popcorn |
| Dinner | Pasta, rice, sauces |
| Canned Goods | Beans, vegetables, soups |
| Beverages | Juice boxes, hot chocolate, drink mixes |
Step 5: Create Functional Pantry Zones
Once you’ve categorized your food, assign each category its own shelf or area.
Think about how your household uses the pantry every day.
For example:
- Place breakfast items together for busy mornings.
- Store baking supplies on one shelf.
- Keep snacks within easy reach.
- Reserve lower shelves for heavy appliances or bulk purchases.
- Store less frequently used items on higher shelves.
This zoning system keeps everything organized and makes it easier for every family member to find what they need.
Step 6: Transfer Dry Goods into Airtight Containers
Dry pantry staples benefit greatly from airtight storage.
Consider transferring items such as:
- Rice
- Pasta
- Flour
- Sugar
- Oats
- Lentils
- Beans
- Cereal
Clear containers make it easy to see when supplies are running low while protecting food from moisture and pantry pests.
However, not everything belongs in a storage container. Canned goods, bottled sauces, and some individually packaged snacks are often best kept in their original packaging.
Step 7: Label Everything Clearly
Labels eliminate guesswork and help everyone maintain your organization system.
A good label should include:
- Product name
- Purchase or refill date (optional)
- Expiration date if transferred from original packaging
Simple, easy-to-read labels create a polished look while making ingredients easy to identify.
Step 8: Arrange Items by Frequency of Use
Store the foods you use most often at eye level for quick access.
A practical shelf arrangement looks like this:
- Eye-Level Shelves: Everyday essentials like cereal, pasta, spices, and cooking oils.
- Upper Shelves: Seasonal baking supplies, serving dishes, or specialty ingredients.
- Lower Shelves: Heavy items such as bottled drinks, bulk flour, pet food, or large containers.
This arrangement improves convenience while making the pantry safer by keeping heavy items lower to the ground.
Step 9: Use Smart Storage Solutions
Maximize every inch of available space with organizers designed for pantry storage.
Helpful solutions include:
- Shelf risers for canned goods
- Lazy Susans for oils, vinegar, and condiments
- Clear bins for snacks and baking supplies
- Door-mounted racks for spices or small jars
- Stackable containers for deep shelves
These organizers make items easier to see and prevent products from getting lost in the back of the pantry.
Step 10: Build a Simple Maintenance Routine
The secret to keeping an organized pantry isn’t perfection—it’s consistency.
Spend just a few minutes each week to:
- Return items to their designated zones.
- Check for nearly empty containers.
- Rotate older products to the front using the First In, First Out (FIFO) method.
- Wipe up spills immediately.
- Update your shopping list as supplies run low.
A regular maintenance habit helps your pantry stay neat and functional all year long.
Pantry Organization Ideas for Different Pantry Types
Every pantry is different, so the best organization method depends on the space you have. Here’s how to organize pantry spaces based on their layout.
Walk-In Pantry
A walk-in pantry offers plenty of storage but can quickly become cluttered without designated zones.
Best practices:
- Store everyday essentials at eye level.
- Keep bulk items on lower shelves.
- Use baskets for snacks and baking supplies.
- Install shelf risers for canned goods.
- Place seasonal items on higher shelves.
Small Pantry
Limited space requires smart storage solutions.
Space-saving ideas:
- Use stackable containers.
- Install door organizers.
- Add shelf risers.
- Store similar items in labeled bins.
- Take advantage of vertical space.
Cabinet Pantry
Kitchen cabinets can function like mini pantries when organized efficiently.
Try using:
- Pull-out baskets
- Clear storage bins
- Turntables for condiments
- Shelf dividers
- Under-shelf baskets
Deep Pantry
Deep shelves often hide food at the back.
To prevent this:
- Use clear pull-out bins.
- Group products by category.
- Store less-used items in the back.
- Rotate food regularly using the FIFO method.
Pantry Organization on a Budget
You don’t need expensive organizers to create a functional pantry.
Affordable ideas include:
- Reuse glass jars for pasta, rice, and beans.
- Repurpose shoeboxes as drawer organizers.
- Buy baskets from discount or dollar stores.
- Print free pantry labels.
- Reuse sturdy food containers when appropriate.
Budget Comparison
| Budget | Recommended Upgrades |
| Under $25 | Labels, baskets, shelf liners |
| Under $50 | Airtight containers and bins |
| Under $100 | Complete pantry makeover with matching organizers |
Even a few inexpensive improvements can make a noticeable difference.
Best Pantry Storage Products
Choosing the right organizers helps keep everything accessible and easy to maintain.
| Product | Best For | Why It’s Useful |
| Airtight Containers | Dry goods | Keep food fresh and visible |
| Storage Baskets | Snacks | Group similar items together |
| Lazy Susan | Oils and sauces | Easy access to bottles |
| Shelf Risers | Canned goods | Increase vertical storage |
| Clear Bins | Deep shelves | Prevent items from getting lost |
| Label Maker | Containers | Easy identification |
Focus on buying products that solve a specific storage problem rather than purchasing organizers you don’t need.
Common Pantry Organization Mistakes to Avoid
Even a well-organized pantry can become cluttered if a few common mistakes aren’t avoided.
Buying Organizers Before Measuring
Always measure your shelves before purchasing containers or baskets.
Ignoring Expiration Dates
Check dates every few months to reduce food waste.
Overfilling Containers
Leave some space so containers remain easy to use and refill.
Forgetting Labels
Without labels, similar-looking ingredients like flour, sugar, and powdered sugar can easily get mixed up.
Mixing Categories
Keep baking supplies, snacks, canned goods, and breakfast foods in separate zones.
Wasting Vertical Space
Shelf risers and stackable bins allow you to use the full height of your pantry.
Foods That Should and Shouldn’t Go into Containers
Not every pantry item benefits from being transferred to another container.
| Store in Airtight Containers | Keep in Original Packaging |
| Rice | Canned food |
| Flour | Bottled sauces |
| Sugar | Juice boxes |
| Pasta | Individually wrapped snacks |
| Oats | Soup cartons |
| Beans | Beverage bottles |
| Cereal | Some sealed snack packs |
Using containers for dry goods helps preserve freshness while keeping your pantry looking clean and organized.
Pantry Maintenance Checklist
Once you’ve learned how to organize pantry spaces effectively, maintaining them becomes much easier.
Daily
- Return items to their designated places.
- Wipe up spills immediately.
Weekly
- Straighten shelves.
- Refill containers if needed.
- Update your grocery list.
Monthly
- Check expiration dates.
- Rotate food using the FIFO method.
- Clean shelves.
Every Three to Six Months
- Remove everything.
- Deep clean shelves.
- Donate unopened food you won’t use.
- Adjust pantry zones if your family’s needs have changed.
Quick Pantry Checklist
- ✔ Empty pantry
- ✔ Clean shelves
- ✔ Remove expired food
- ✔ Group similar items
- ✔ Use containers
- ✔ Label everything
- ✔ Create pantry zones
- ✔ Maintain weekly
Conclusion
Learning how to organize pantry spaces isn’t about achieving perfection—it’s about creating a system that works for your lifestyle. By emptying your pantry, decluttering, grouping similar foods, using practical storage solutions, and maintaining simple routines, you’ll enjoy a kitchen that’s easier to use and more efficient every day.
Remember that pantry organization doesn’t have to happen all at once. Start with one shelf, one category, or one weekend project. Small, consistent improvements can lead to lasting results, helping you save time, reduce food waste, and make cooking a more enjoyable experience.
Whether you have a spacious walk-in pantry or a compact kitchen cabinet, these practical strategies will help you build an organized pantry that stays tidy for the long term.
Frequently Asked Questions
How often should I organize my pantry?
A quick tidy-up each week and a thorough reorganization every three to six months helps keep your pantry clean and functional.
What is the best way to organize a small pantry?
Use vertical storage, stackable containers, door organizers, and labeled bins. Keep frequently used items at eye level and maximize every inch of available space.
Are clear containers necessary?
No, but they make it much easier to see what’s inside, monitor food levels, and create a consistent, organized appearance.
What is the FIFO method?
FIFO stands for First In, First Out. Place older products at the front and newer purchases behind them so older items are used first.
Should all dry foods go into airtight containers?
Most dry goods such as flour, rice, pasta, sugar, oats, and beans benefit from airtight containers because they help protect against moisture and pests.
How can I organize my pantry on a tight budget?
Start by decluttering, reuse jars and containers you already own, repurpose baskets or boxes, and purchase only the organizers you truly need over time.
What’s the biggest pantry organization mistake?
Skipping the planning stage. Measuring shelves, creating categories, and assigning pantry zones before buying organizers leads to a much more functional setup.